Concept:
Sheet sets are the digital version of the rolled up groups of drawings shoved in the back corner behind you. Actually they are the next logical progression from Pack 'n' Go. This time though, you are just sending the layouts and not your actual CAD file. There are a lot of variables involved when you use these, but you will give you an idea of what's involved. Sheet sets can be published as DWF's or opened up in ACAD 2005 (.dst extension).
| COMMAND | KEYBOARD | ICON | DESCRIPTION |
| Sheetset |
Sheetset
|
Opens the Sheetset Manager |
Procedure:
The first thing you would do is check that you have all your 'ducks in a row' concerning the drawings and layouts that you plan to publish. It sounds obvious, but you don't want to keep creating Sheet Sets after you find the layouts are scaled wrong, duplicated or whatever.
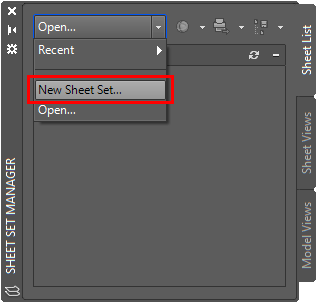
Start the command, SHEETSET, or use the File > New Sheet Set menu option to invoke the command (for those that like icons, it looks like the rolled up sheets shoved in the corner behind you. The palette will open as shown below - select the New Sheetset option.
After that , you'll see what could
possible be the largest dialog box you've ever seen with so
little info:
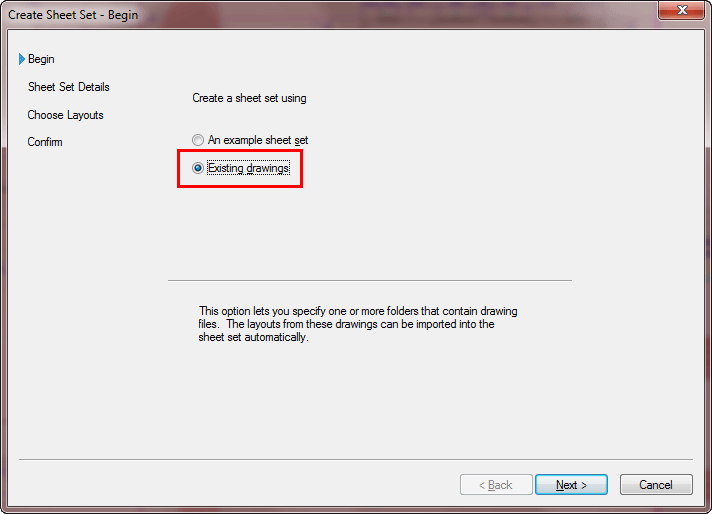
In this example,
use some existing drawings that are part of
the default samples provided. you Press "Next" and
get taken to Step 2.
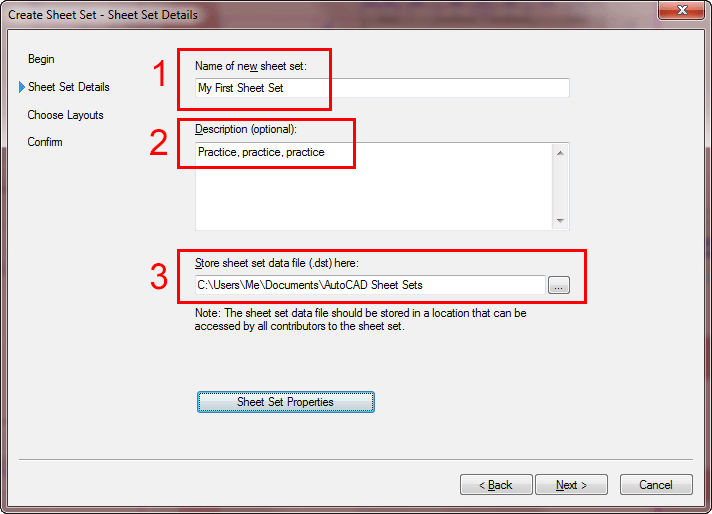
This seems fairly simple, give
your set a name(1), a description(2), tell AutoCAD
where to save the file(3). There is a button for "Sheet
Set Properties" that gives you some more options
on the set (below) - you can even create your own
custom fields here.
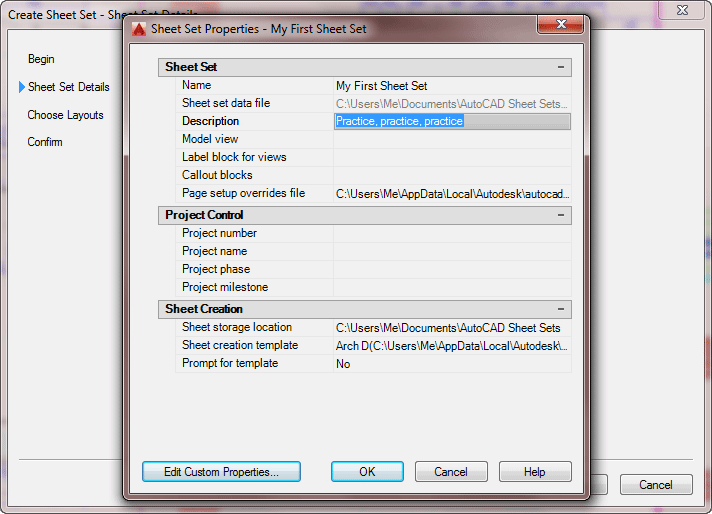
For the sake
of simplicity, this lesson will not cover this, but it is straightforward to create your own fields.
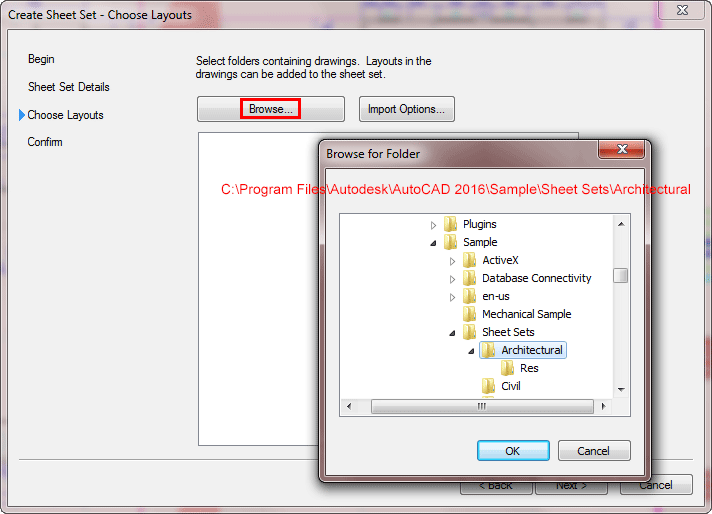
The next tab is where
you can select the "folders" where your drawings
are saved and add them to the Set. In your AutoCAD installation folder, select the sample folder shown below.
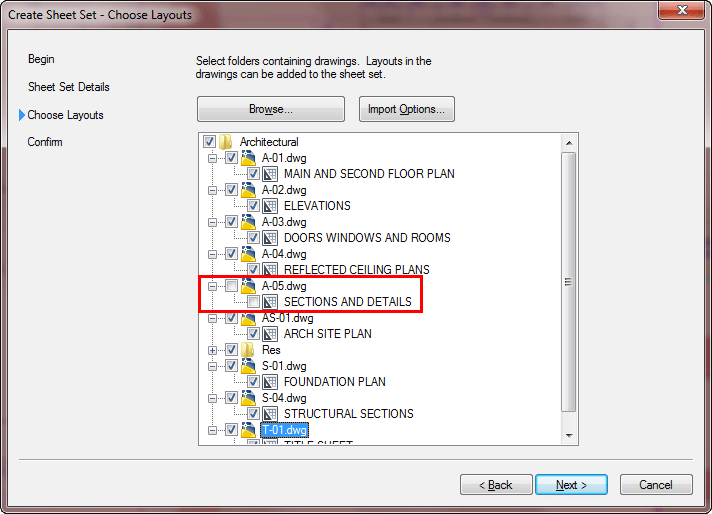
You now can turn on or off
the layouts as you need to them.
The last step is to confirm what you just did in the final
tab of the wizard.
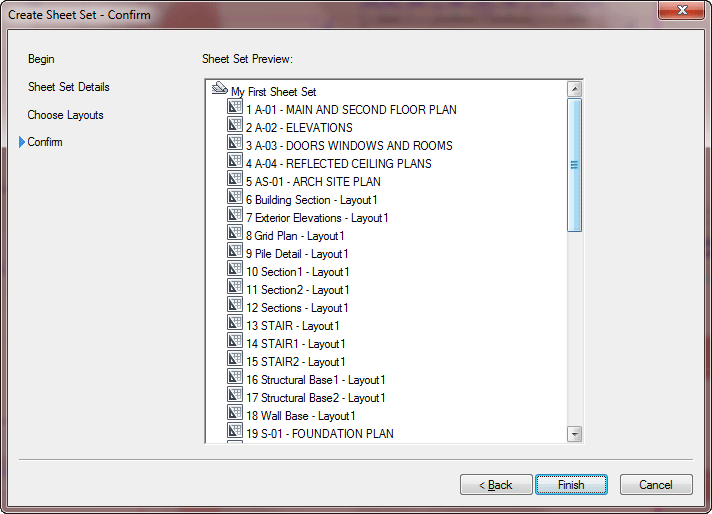
You see a list
of layouts that will be part of this Sheet Set - if it's
what you want, press "Finish".
After finishing the wizard, you are back in AutoCAD and ready to work with the Sheet Set.
After finishing the wizard, you are back in AutoCAD and ready to work with the Sheet Set.
If you double-click
on a sheet name, it opens up in a layout tab. you have
other options as well if you right-click on a sheet.
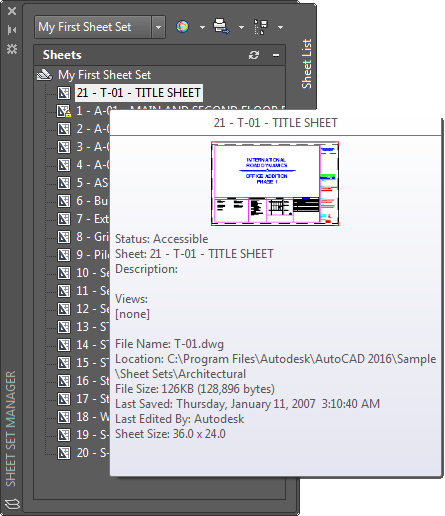
The view list (second tab down) allows you to zoom directly to any saved
view that was part of the layout (a new, great use for views).
In the Publish menu there is a button
that lets you "Publish to DWF". This will
publish whichever Sheets you have highlighted (all
in one file). You can also right-click and select Publish for individual sets.
In the "Details" section,
you have the option of either viewing the file information,
or a thumbnail.
Banner sudah terpasang..
ReplyDeletesilahkan cek
http://bangvandawablog.blogspot.com/2011/10/tukar-link.html