-
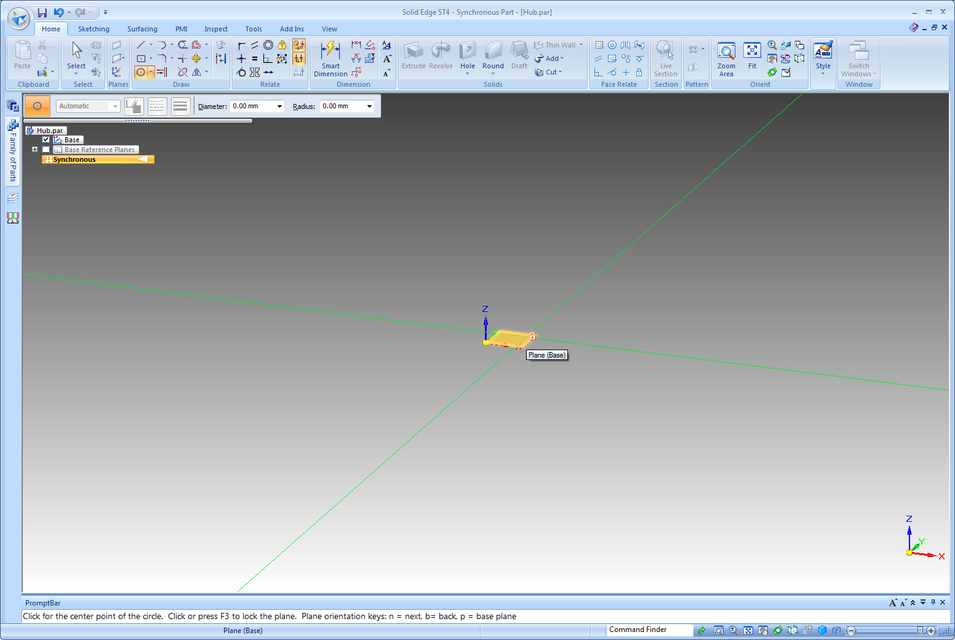
Step 1
Start a new part file and make sure you’re in Synchronous.
Select the circle tool and lock to the Top plane with F3, as shown.

-
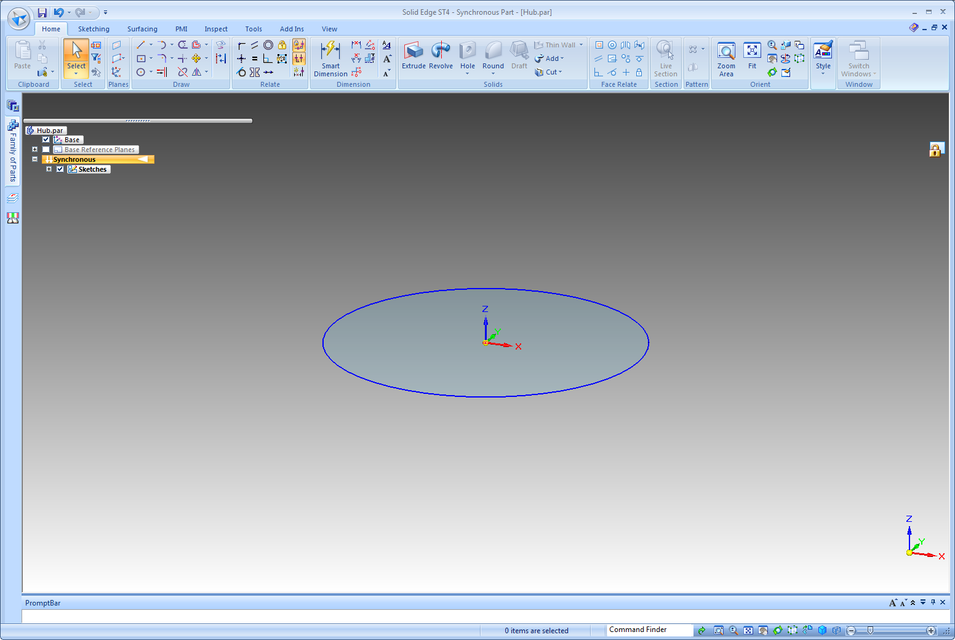
Step 2
Draw a circle centred on the origin that is 180mm diameter, as shown.

-
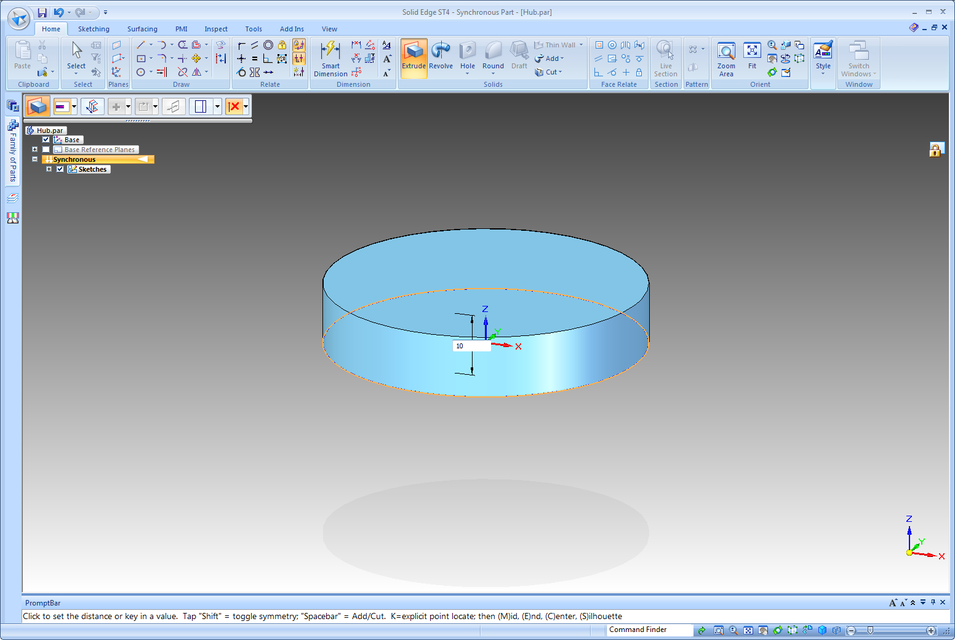
Step 3
Extrude the region up 10mm using the Synchronous steering wheel, as shown.

-
Step 4
Draw another circle on top of the existing face that is 100mm diameter, as shown.

-
Step 5
Extrude the circle up 110mm using the steering wheel, as shown. Add a Smart Dimension from the top face to the bottom of the part. It should be 120mm. Lock the dimension by selecting the dimension and clicking the Lock icon, as shown.

-
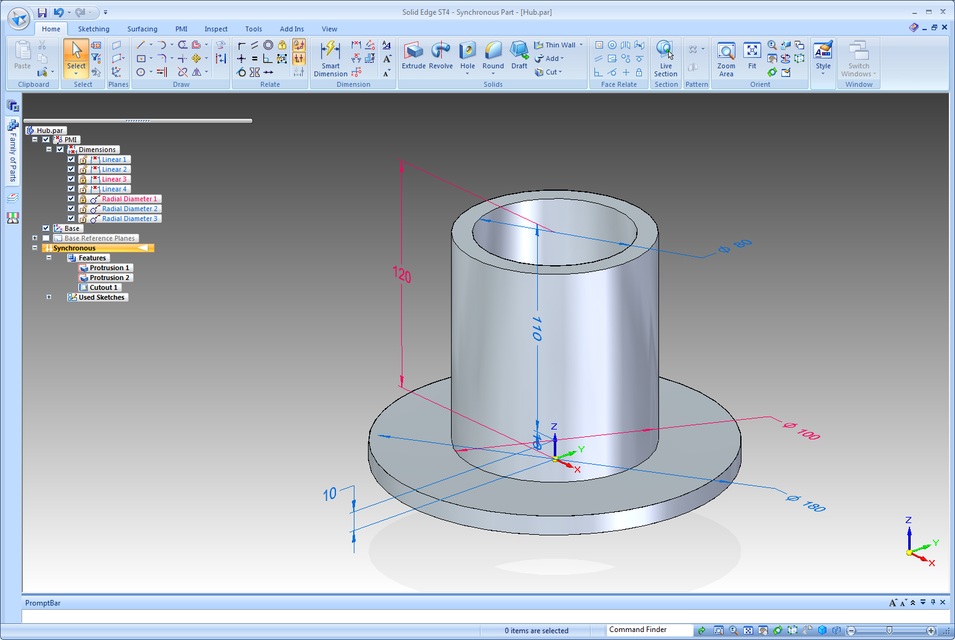
Step 6
Add the other Smart Dimensions as shown to define the Inner Diameter, Flange Thickness, and Flange Diameter. We will lock these dimensions later using the Variable Table.

-
Step 7
Add a hole 16mm diameter in about the position shown. Do not yet worry about the precise location.

-
Step 8
Click the Coplanar Axis Face Relate command as shown to align the new hole with the main base plate of the part.

-
Step 9
Select the hole and the outer face of the part as shown. Use QuickPick to select the XZ Plane (Base) as the reference plane.

-
Step 10
Click the Symmetric Diameter tool as shown to dimension the pitch circle diameter of the hole.

-
Step 11
Select the outer cylindrical face of the part and then the hole to add a symmetric dimension. Note that you can toggle the display of full or half diameter with the button as shown.

-
Step 12
Now we will pattern the hole in a Circular Pattern with 4 occurrences. Select the hole and then click the Circular Pattern tool as shown.

-
Step 13
Enter the count as 4 if not already the default as shown

-
Step 14
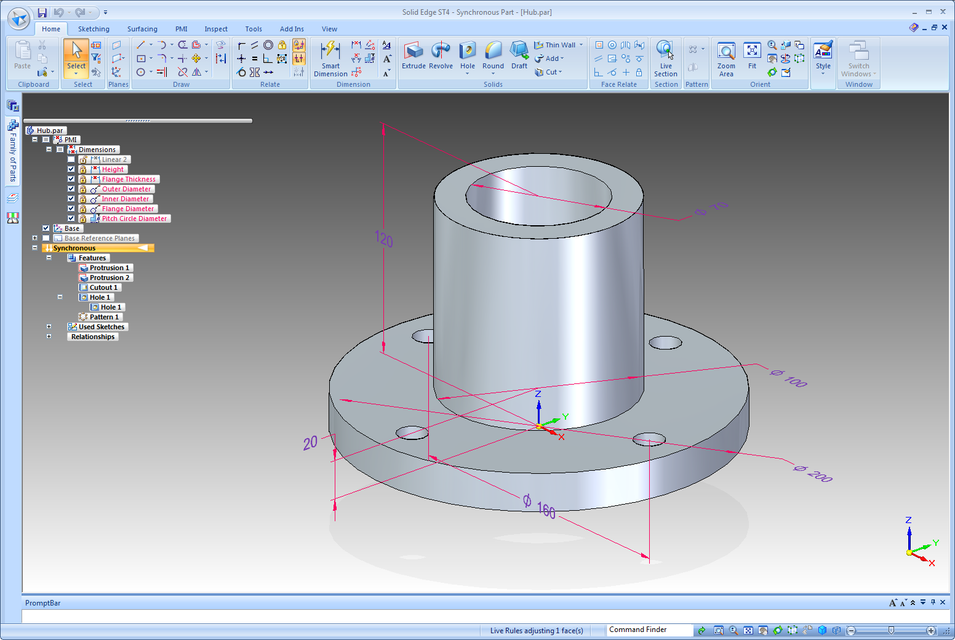
The part is now complete, as shown. We will now link the variables to Excel.

-
Step 15
Open the Variable Table as shown.

-
Step 16
Now create an Excel file as shown.

-
Step 17
In Solid Edge again, make sure that all variable filters are on to show all variables in the file, as shown.

-
Step 18
Now lock all the dimensions shown and rename them according to the image below. Note that the order of your variables may be different. Take care that you name the proper variables.

-
Step 19
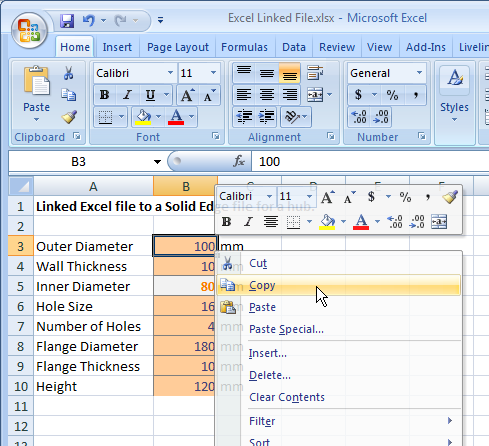
Now we’re ready to link a variable from Excel to Solid Edge. Select cell B3 in Excel and Copy it (Ctrl+C), as shown.

-
Step 20
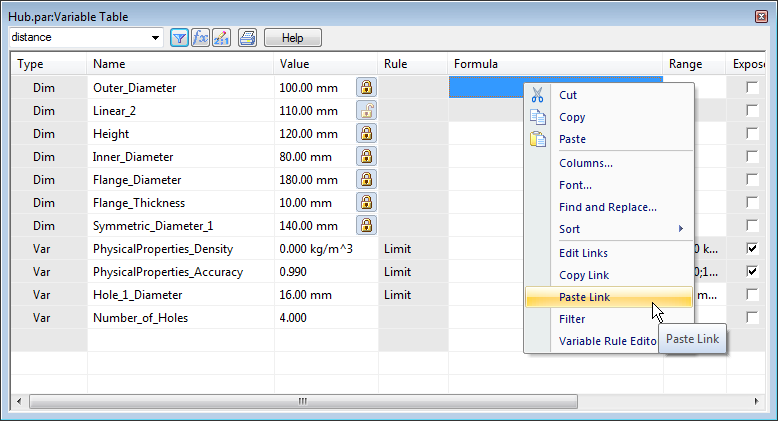
With the cell in Excel still highlighted as Copying, select the Outer_Diameter variable Formula cell in the Variable Table in Solid Edge and right-click. Choose the Paste Link option, as shown.

-
Step 21
Click OK to accept the message from Solid Edge about Live Rules, as shown.

-
Step 22
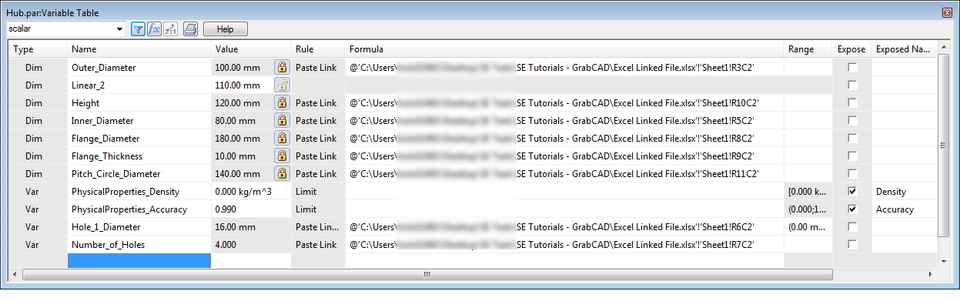
Do the same thing for all the variables we want to link to Excel. The variable table should look as shown below.

-
Step 23
We’re done! Notice that the dimensions we’ve linked to Excel have changed colours in the view. They are now purple to indicate the link, as shown.

-
Step 24
To test things out, make the following changes to the Excel file:

-
Step 25
Notice that the Solid Edge model updates in real time!

-
Step 26
Some notes:
1) The link between Solid Edge and Excel is a hard-coded row & column number (e.g. B3). So if you add rows or columns to your Excel file, your links will not work as expected.
2) If you need to make changes to your Excel file and Solid Edge file together you need to open the Excel file first. Otherwise Excel will open up your file Read-Only.
Sunday, 7 October 2012
How to drive a Solid Edge model from Excel
This is how to drive a Solid Edge model from Excel


Subscribe to:
Post Comments (Atom)
No comments:
Post a Comment